Microsoft Entra ID (Azure Active Directory)
Microsoft Entra ID (formerly Azure Active Directory) is the identity and access management service used across the Tokenise platform.
All users, applications, and services authenticate through Entra ID, providing centralized control over:
- User accounts and credentials
- Application registrations
- Role-based access control (RBAC)
- Single Sign-On (SSO)
- Multi-factor authentication (MFA)
Access Microsoft Entra ID
You can access Microsoft Entra ID through two different methods:
Option 1: Direct Entra ID Portal
This is the dedicated portal for Microsoft Entra ID with a modern interface focused specifically on identity and access management.
Login Process:
- Navigate to entra.microsoft.com
- Enter your email address
- Important: If you're signing in with an organizational account (not a personal Microsoft account):
- After entering your email, you may see a prompt asking how you want to sign in
- Select "Sign in with an organization"
- This ensures you authenticate against your organization's directory (e.g.,
tokenise.io) - Complete authentication (password + MFA if enabled)
- You'll have access to all Entra ID features
Option 2: Azure Portal
You can also access Entra ID through the main Azure Portal:
- Navigate to portal.azure.com
- Sign in with your organizational credentials
- In the Azure Portal search bar (top), type "Entra ID" or "Azure Active Directory"
- Select Microsoft Entra ID from the search results
- You'll be taken to the Entra ID management interface
Both portals provide the same functionality - use whichever you prefer. The dedicated Entra portal (entra.microsoft.com) offers a more streamlined experience for identity management tasks.
Understanding Organization Sign-In
When logging in to Microsoft services with a work/school account:
- Personal Microsoft Account: Used for personal services (Xbox, Outlook.com, OneDrive personal)
- Organizational Account (Work/School): Managed by your organization's Entra ID (e.g.,
user@tokenise.io)
Why "Sign in with an organization" matters:
- Your email might exist in multiple directories (personal Microsoft account + organizational account)
- Selecting "Sign in with an organization" ensures you authenticate against the correct directory
- This gives you access to your organization's resources, apps, and permissions
- Without this, you might accidentally sign in with a personal account that doesn't have the required access
Tip: If you're always signing in with the same organizational account, your browser will remember this preference for future logins.
Add Entra ID Account
To grant team members access to Azure DevOps and enterprise applications, you need to add them to Microsoft Entra ID and assign appropriate roles.
Step 1: Invite External User
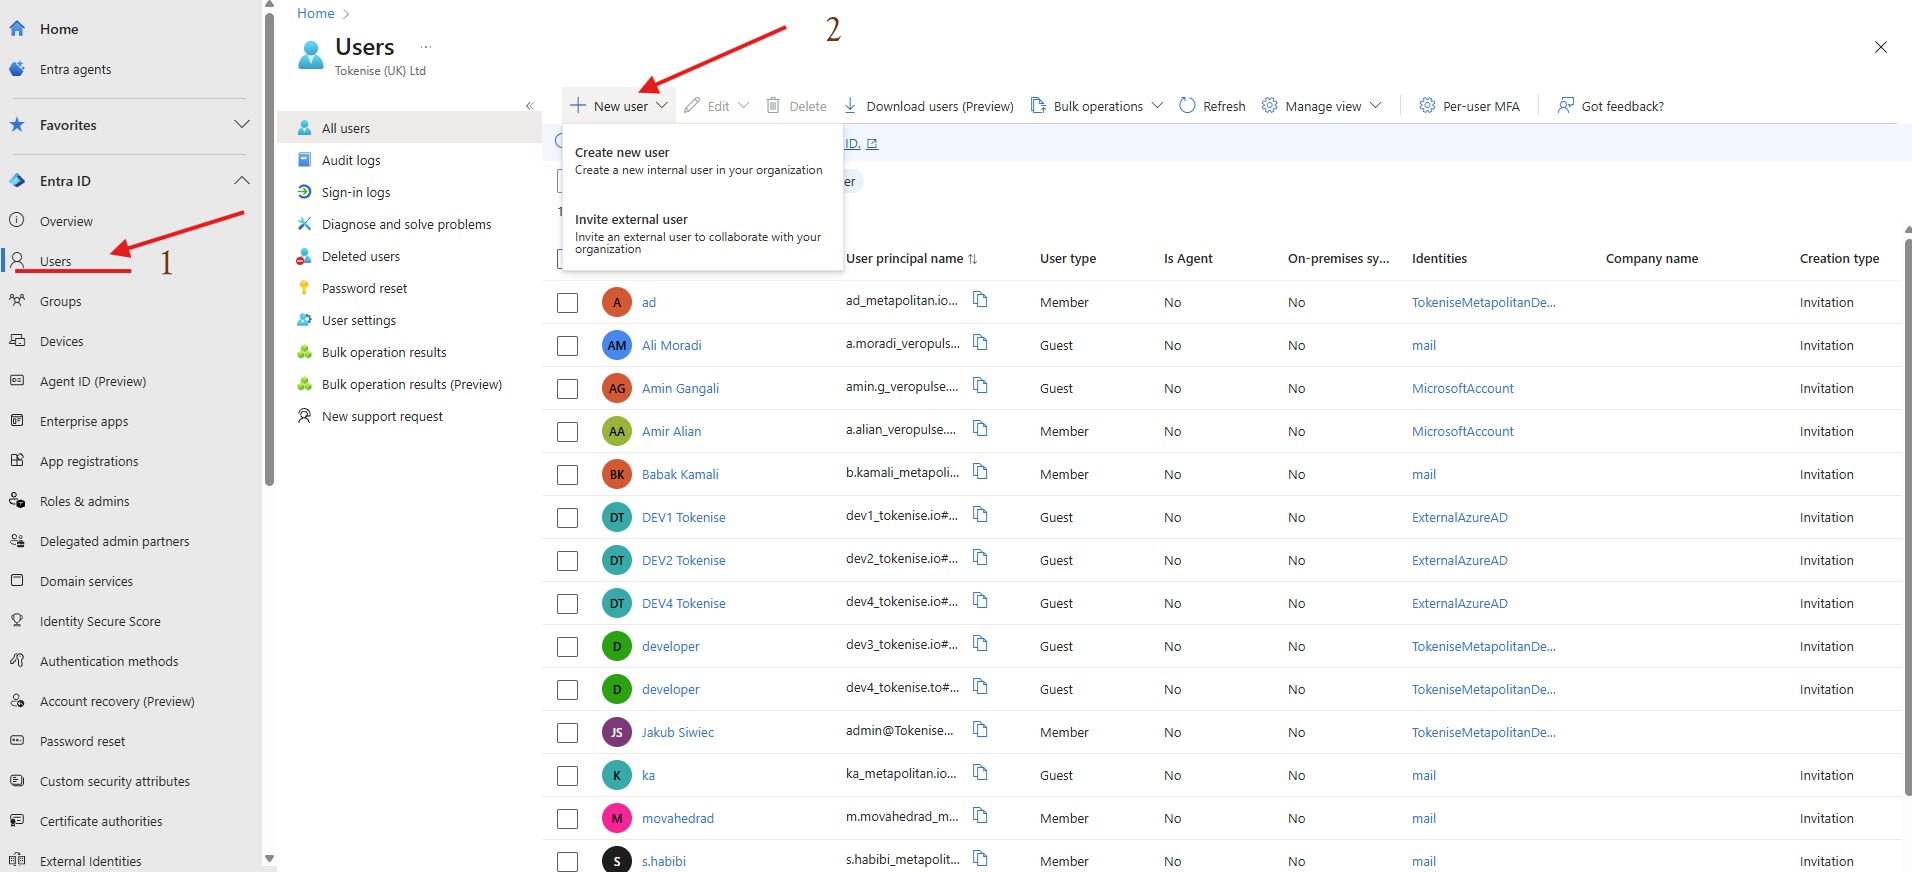
- Navigate to Entra ID → Users in the Azure Portal
- Click New user dropdown → Select Invite external user
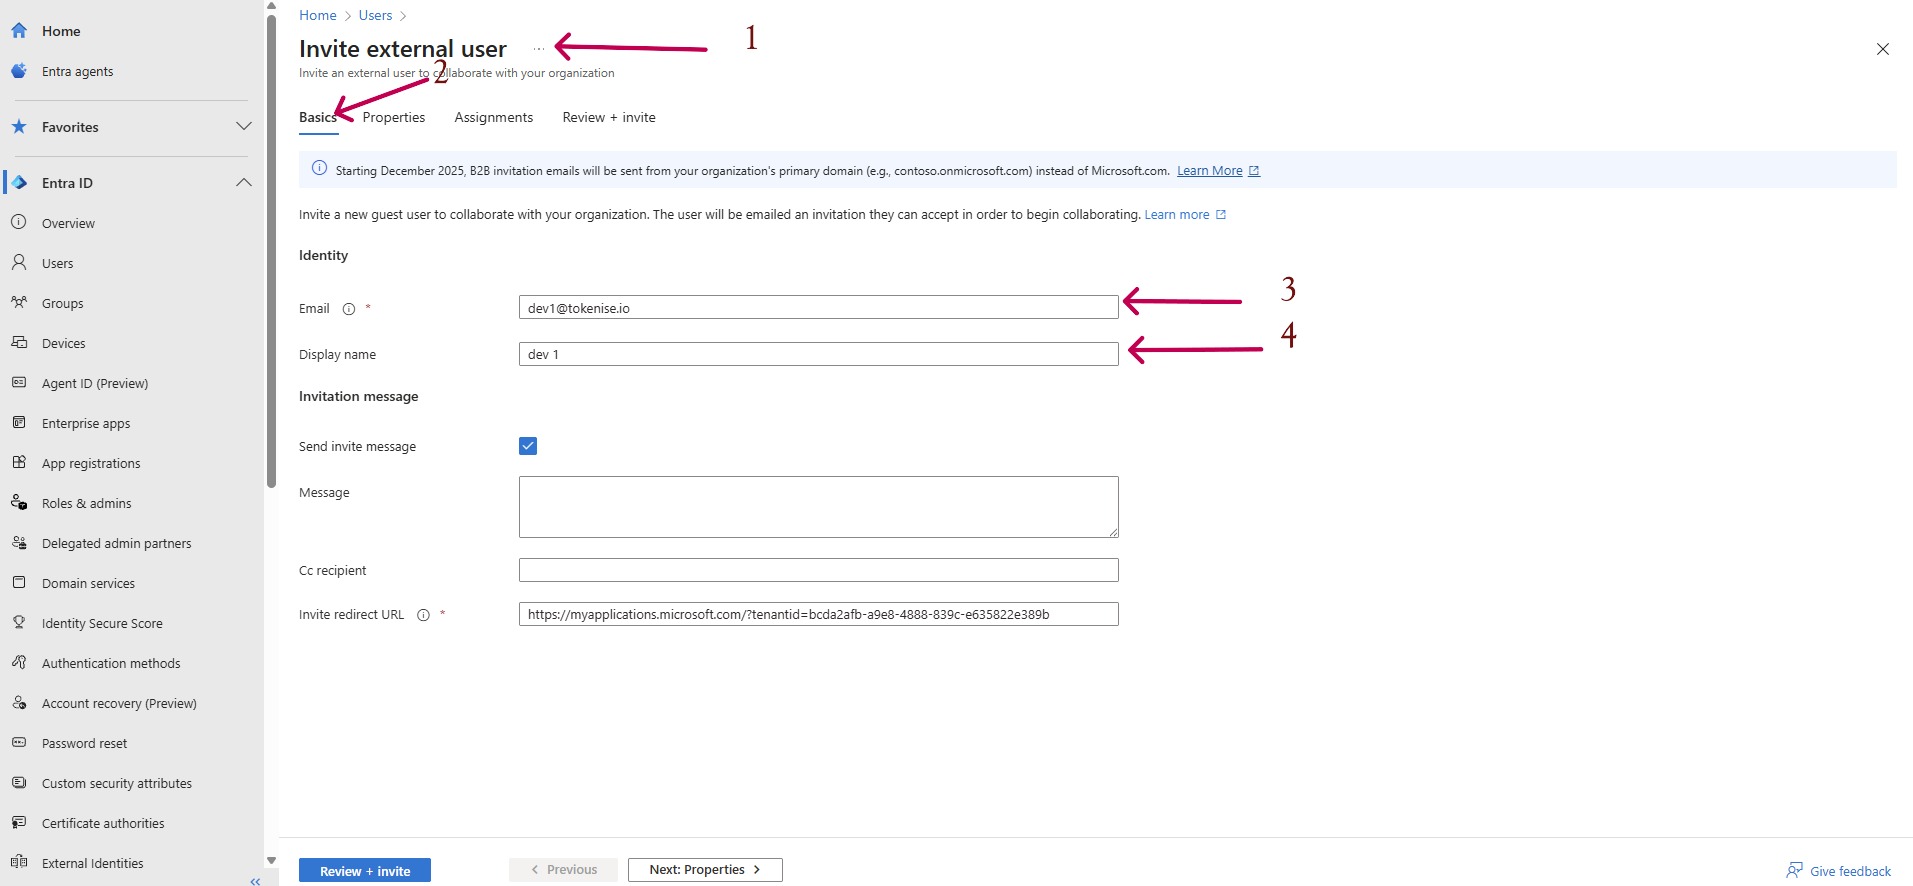
- Fill in the user details:
- Email: Enter the user's email address (e.g.,
dev1@tokenise.io) - Display name: Enter a display name (e.g.,
dev 1) - Optionally configure:
- Invitation message: Customize the welcome email
- Cc recipient: Add additional recipients to the invitation
- Click Review + invite to send the invitation
The user will receive an invitation email to collaborate with your organization.
Step 2: Assign User to Enterprise Application
After the user accepts the invitation, you need to grant them access to specific applications.
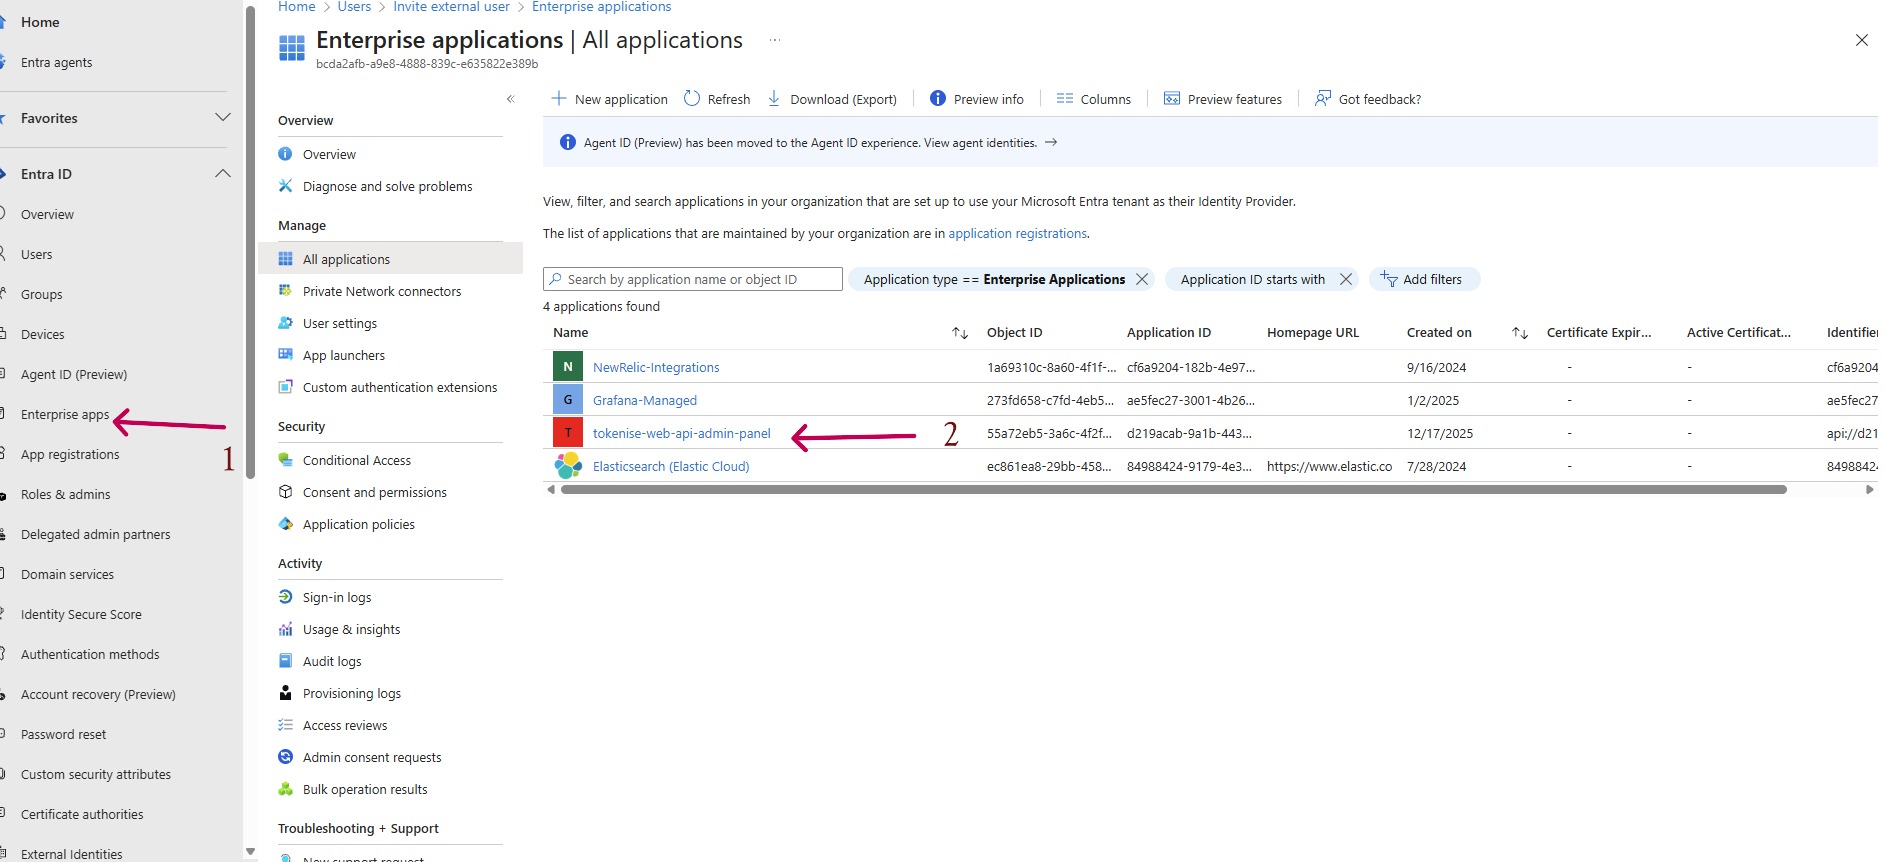
- Go to Entra ID → Enterprise applications
- Find and select the application (e.g.,
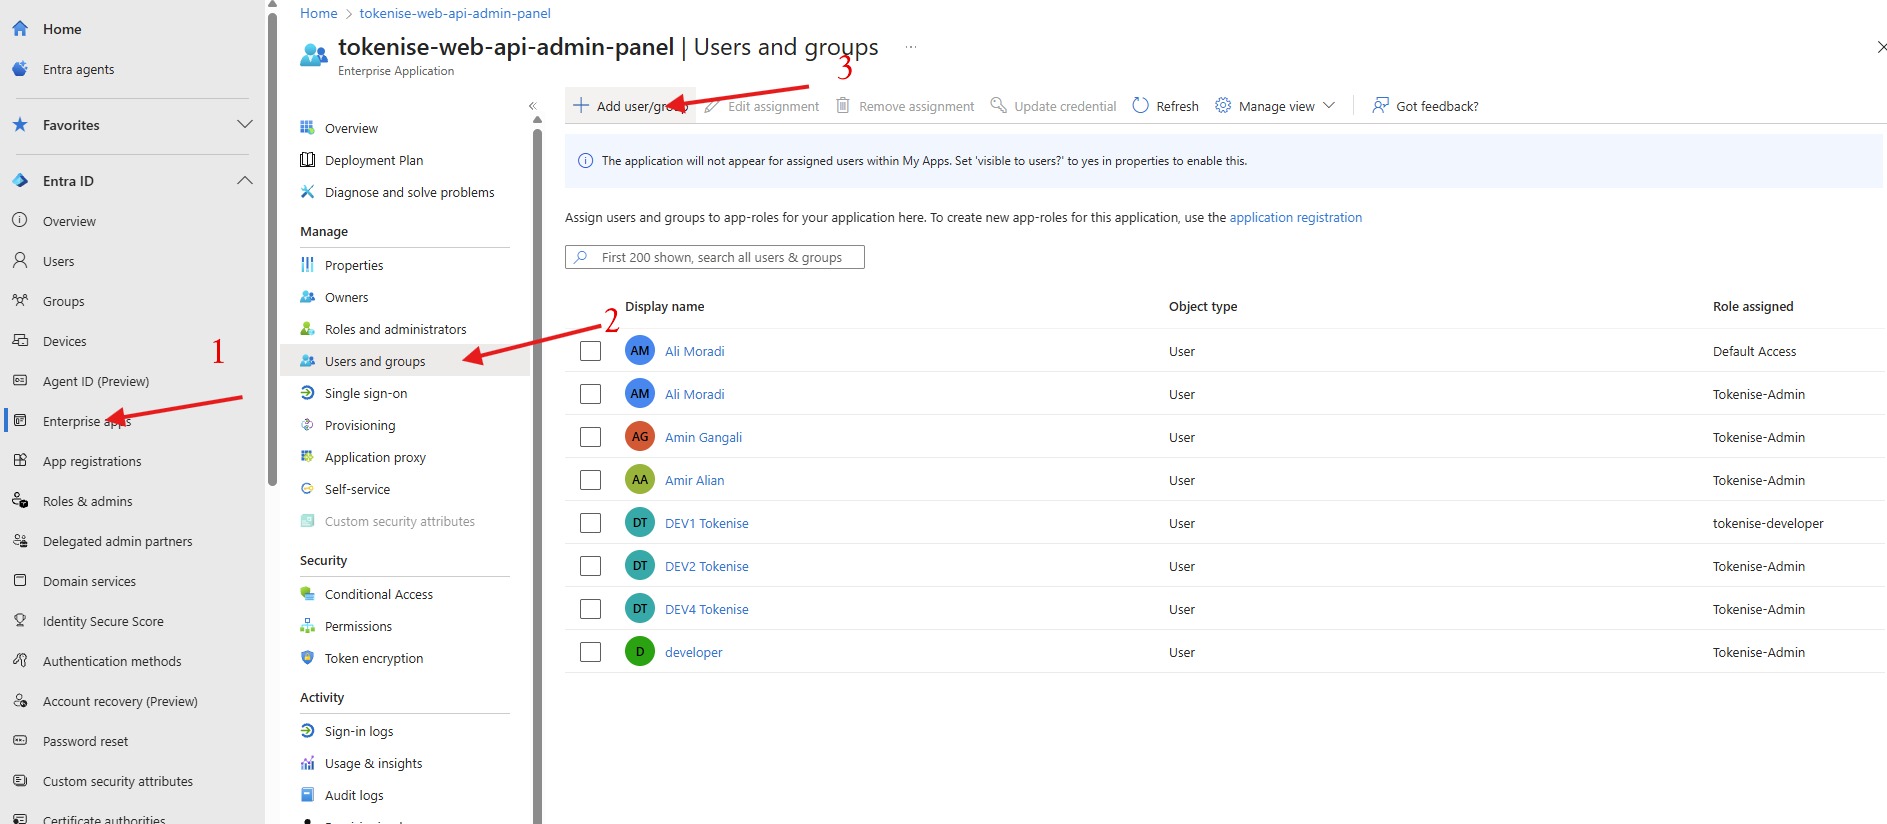
tokenise-web-api-admin-panel) - Navigate to Users and groups in the left menu
- Click Add user/group
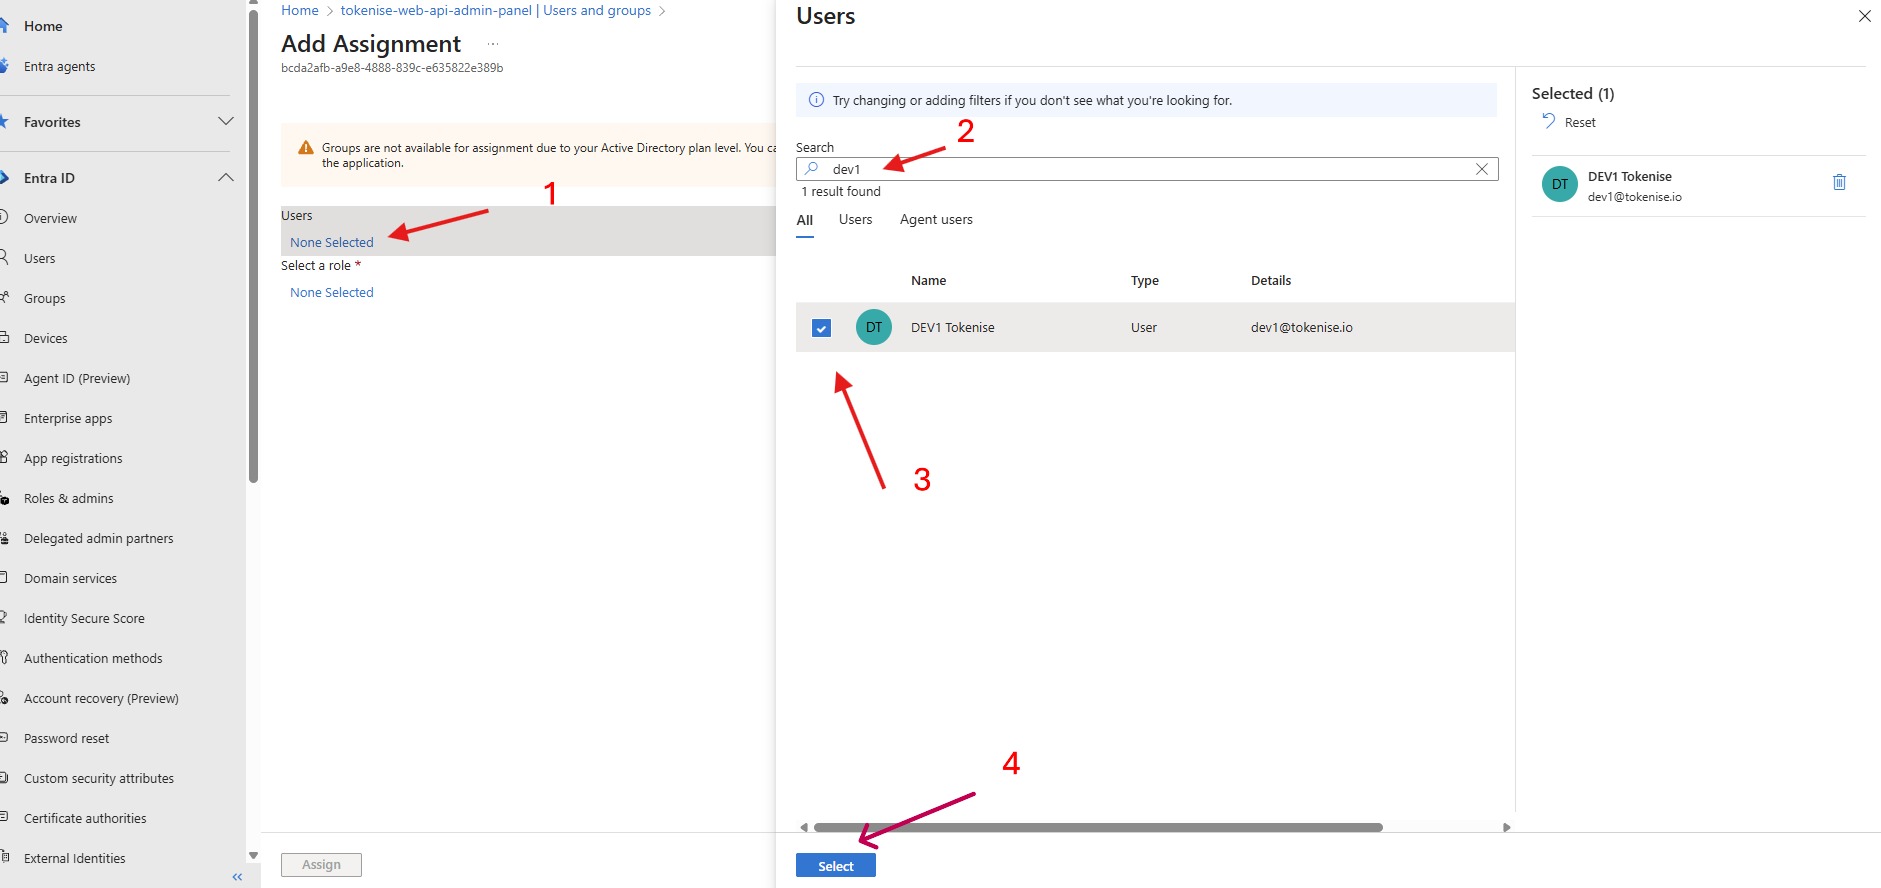
- In the Add Assignment dialog:
- Click None Selected under Users
- Search for the user (e.g.,
dev1) - Select the user from the results
- Click Select
Step 3: Assign Role to User
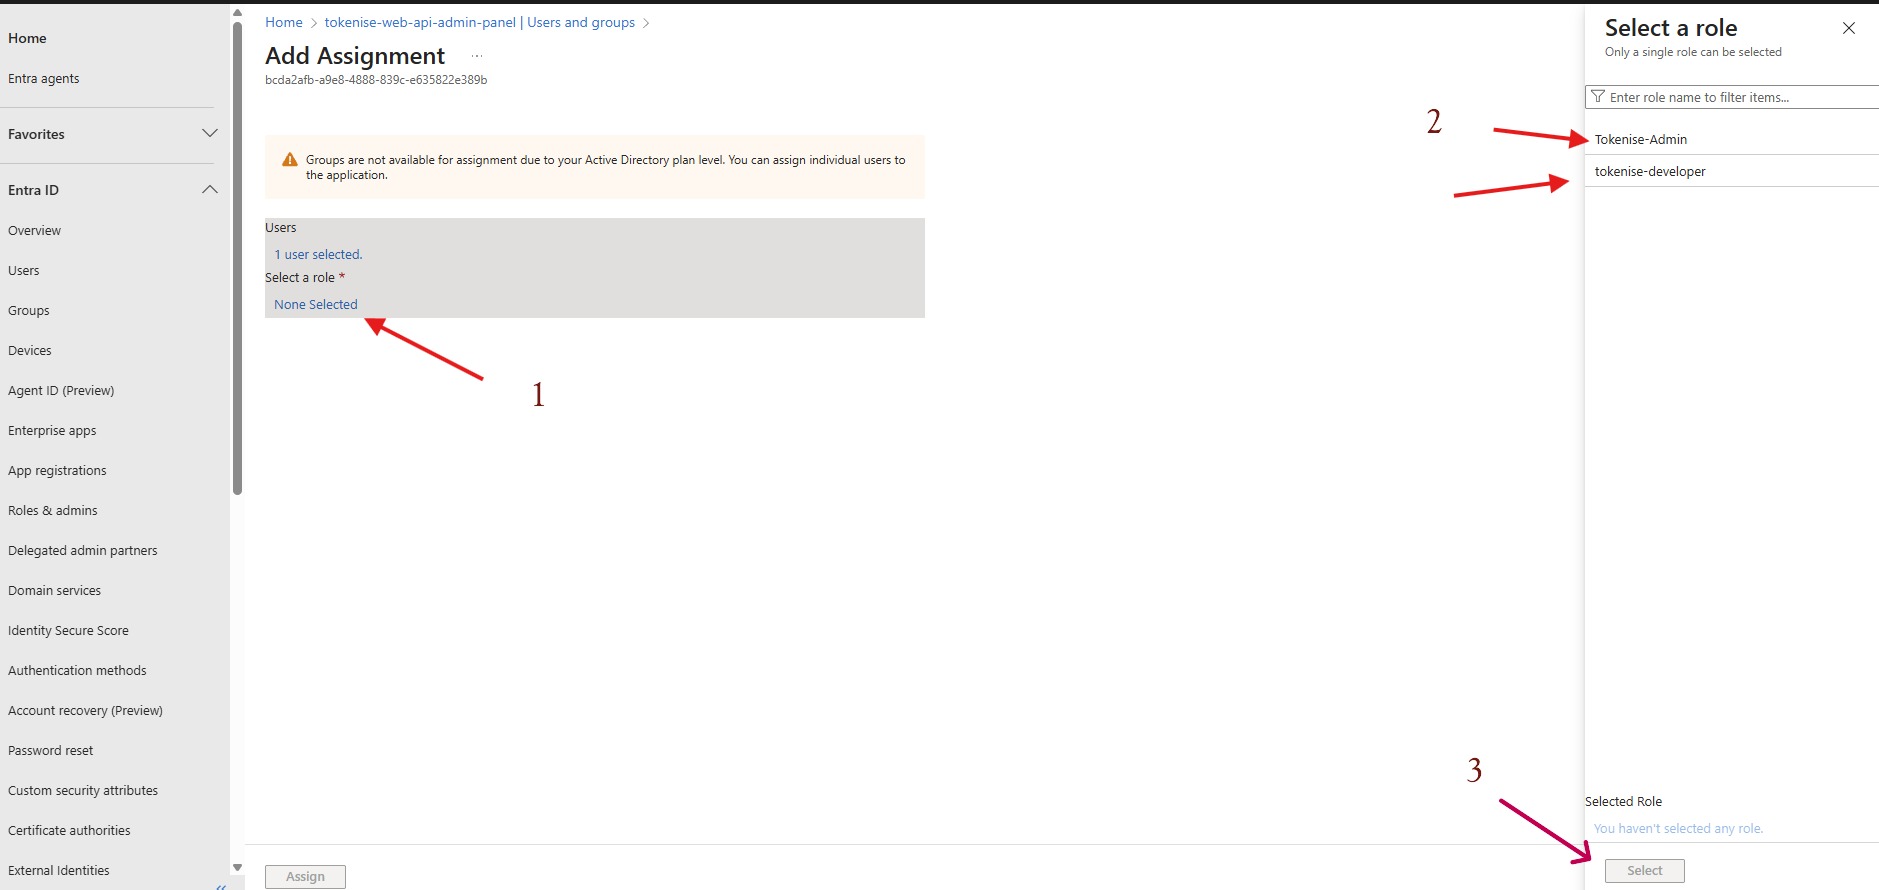
- After selecting the user, click None Selected under Select a role
- Choose the appropriate role from the available options:
- Tokenise-Admin: Full administrative access
- tokenise-developer: Developer access with limited permissions
- Click Select to confirm the role
- Click Assign to complete the assignment
Step 4: Verify Assignment
After assignment, you can verify the user has been granted access:
- Go to Enterprise applications → Your application → Users and groups
- You should see the user listed with their assigned role in the Role assigned column
- The user can now access the application with the permissions associated with their role
Important Notes
- Groups are not available for assignment if your Active Directory is on a lower plan level. In such cases, you can only assign individual users.
- Users must accept the invitation before they can be assigned to applications
- Role assignments are immediate and do not require the user to log out and back in
- You can modify or remove user assignments at any time from the Users and groups section
Entra ID in Tokenise Architecture
Within the Tokenise ecosystem, Entra ID serves as the central authentication authority for:
- Admin Panel: Administrative access control
- Backend-Core: API authentication and authorization
- CMS: Content management access
- Azure DevOps: Source control and pipeline access
- Other enterprise applications: Unified identity across all services
This centralized approach ensures:
- Consistent security policies across all services
- Simplified user management
- Audit trail for all access and authentication events
- Support for compliance requirements
Security Best Practices
When managing Entra ID accounts for Tokenise:
- Use Multi-Factor Authentication (MFA) for all users with administrative access
- Apply the principle of least privilege - grant only the minimum required permissions
- Regularly review user access and remove inactive accounts
- Use Conditional Access policies to enforce security requirements based on context
- Enable audit logging to track all authentication and authorization events
Related Documentation
- Admin Panel - Administrative console using Entra ID authentication
- DevOps - CI/CD platform access management
- Backend-Core - API authentication flows